Sari Silk Yarn

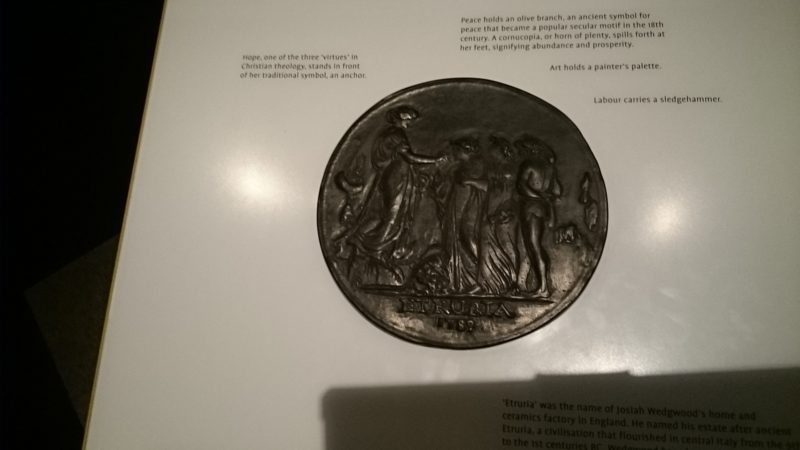
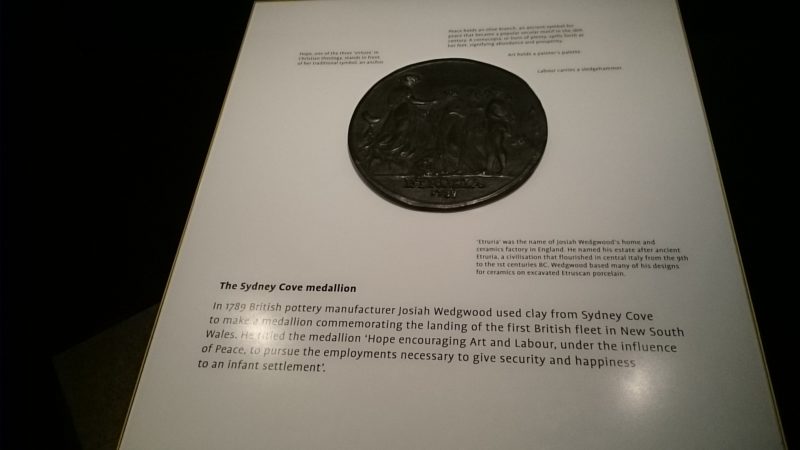
Mum asked me how I’ve been making my own sari silk yarn and what it looks like.

So I thought I would do up a quick blog post whilst I drank my Prana Chai this afternoon and show you how I’ve been making it.

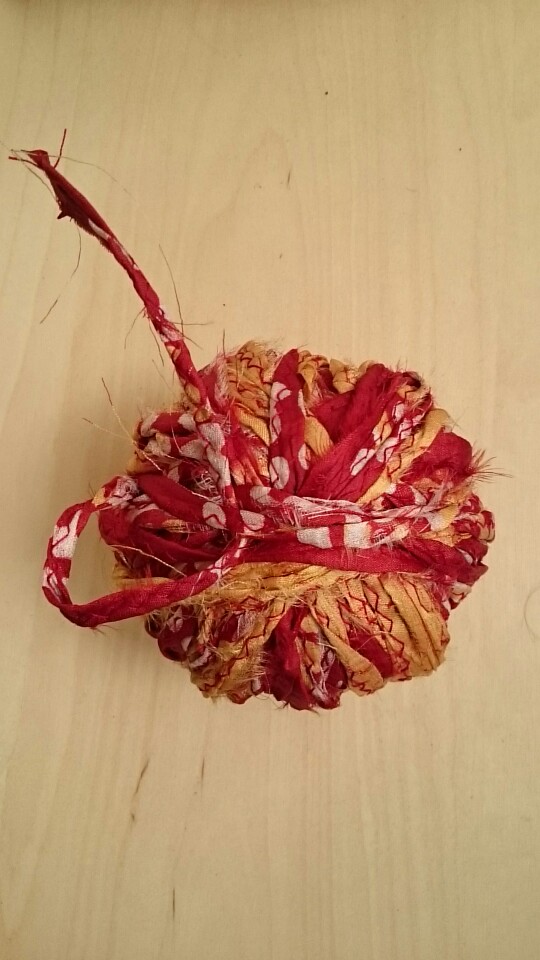
Now the yarn I’ve been making isn’t the heavily rolled one, but the one that looks more like ribbon.  This is how it looks in the blanket.

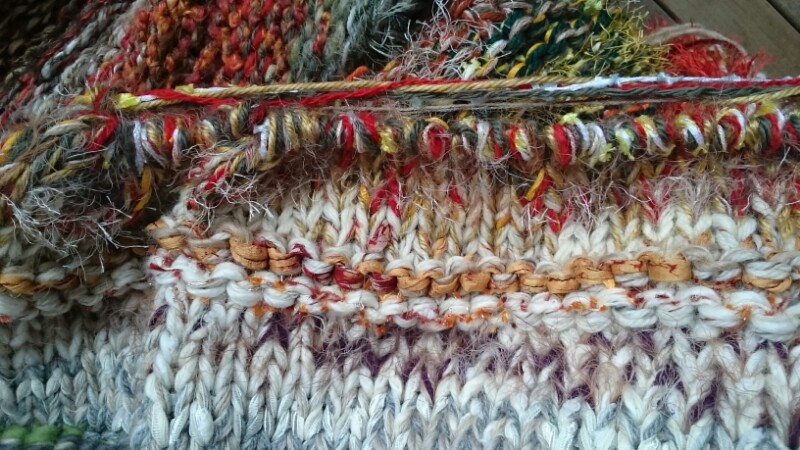
It’s the mustard and red coloured stuff in the garter (?) stitch area.
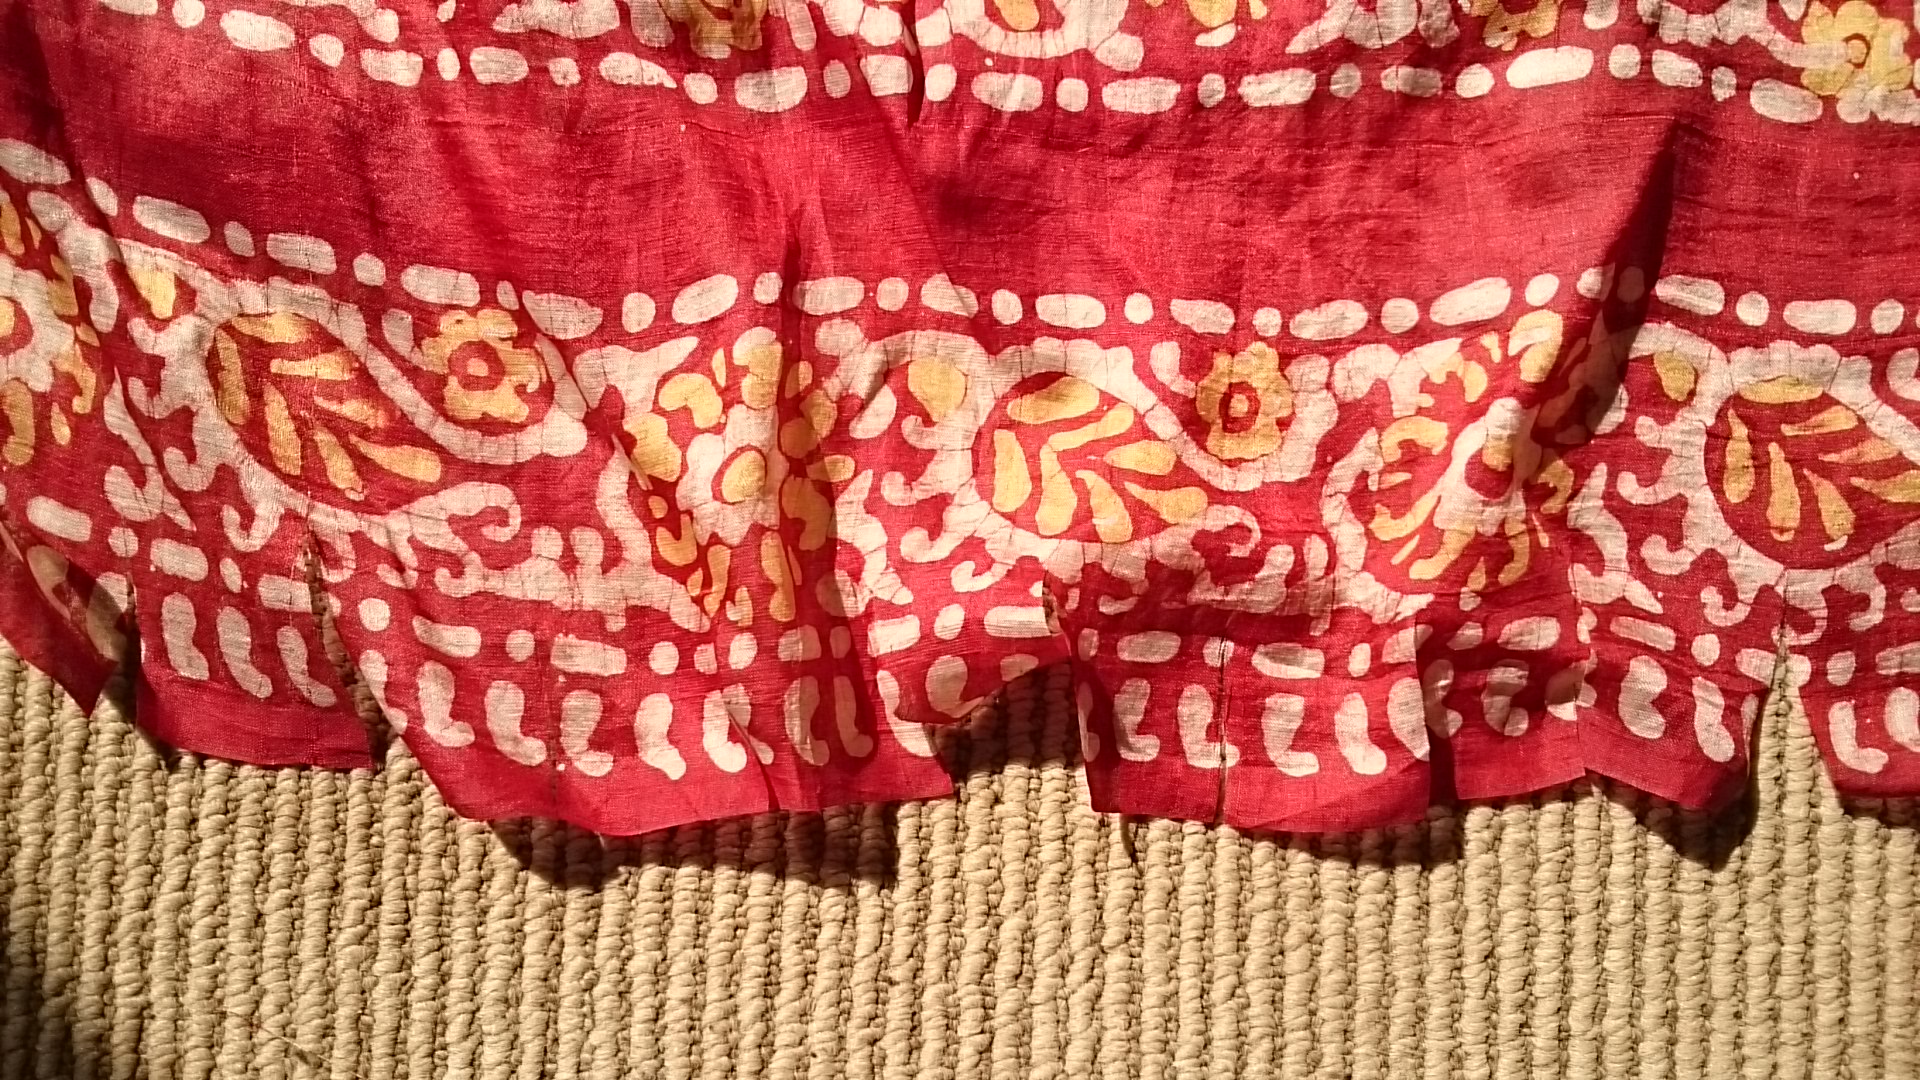
So I start with the old sari, obviously.  This one is quite worn, not a glossy silk and matched our autumnal colours so doesn’t stand out considerably which is what we wanted at the time. The next couple of old saris will have slightly brighter colours.

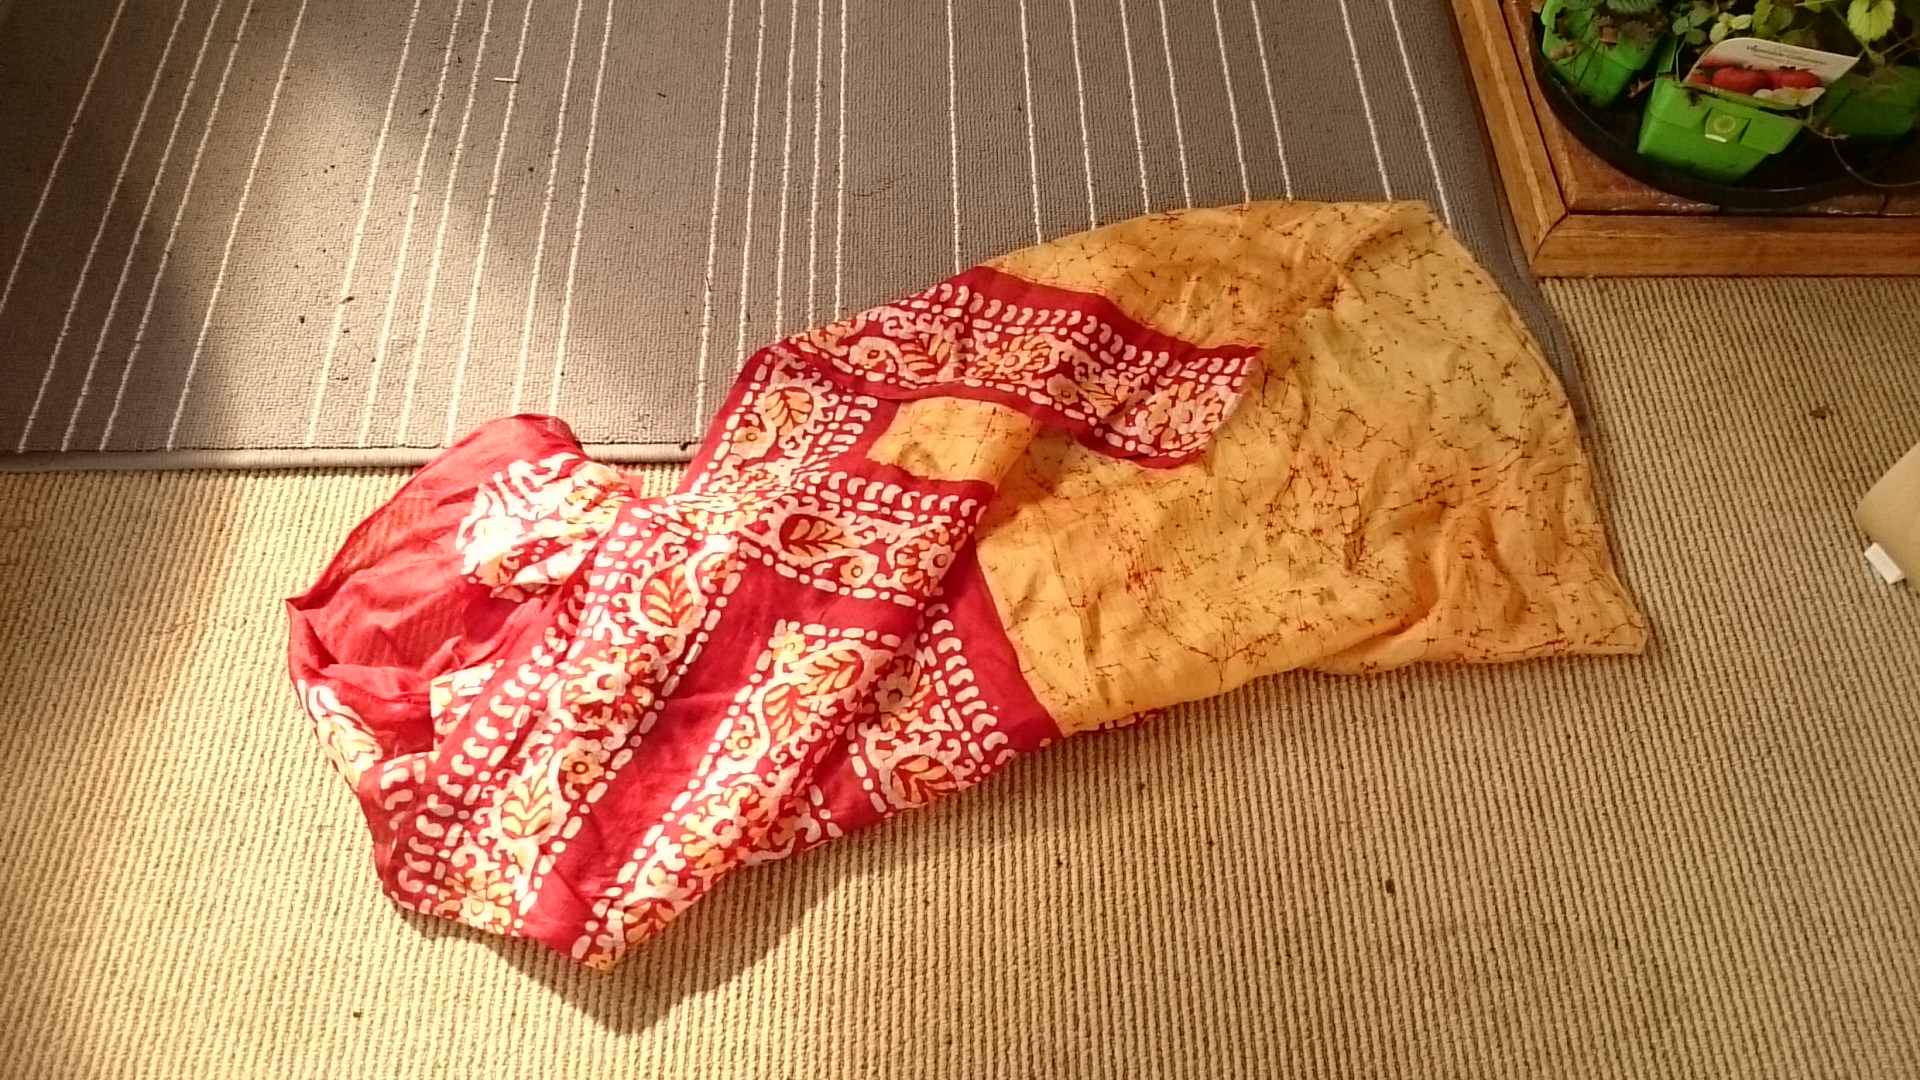
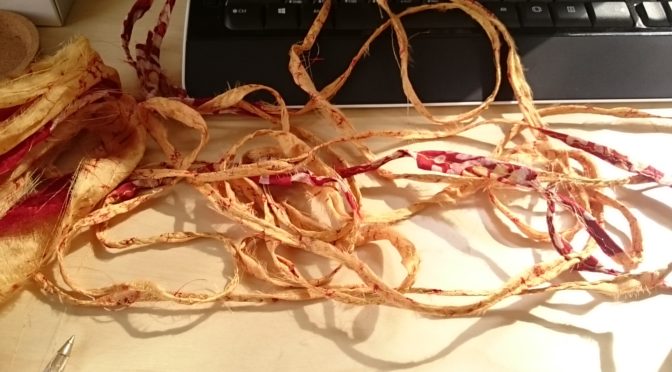
The remains of the sari.

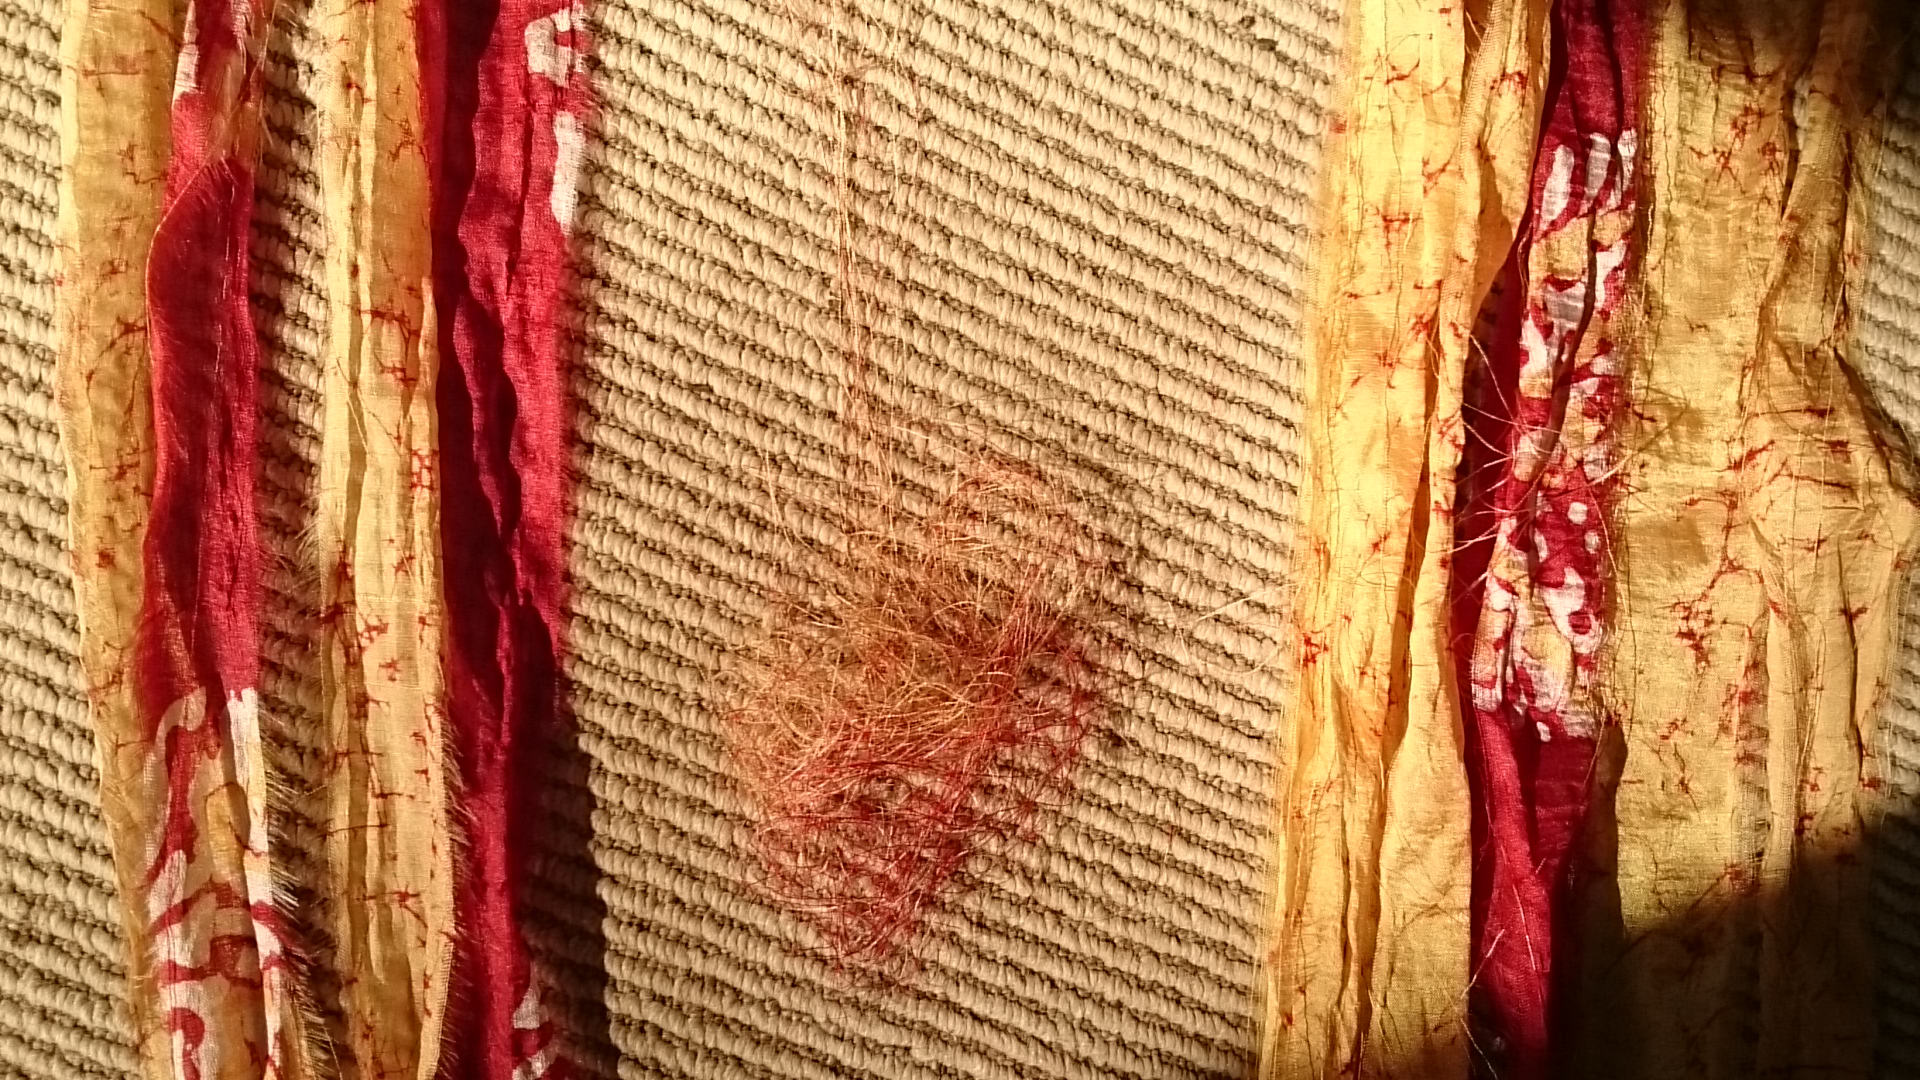
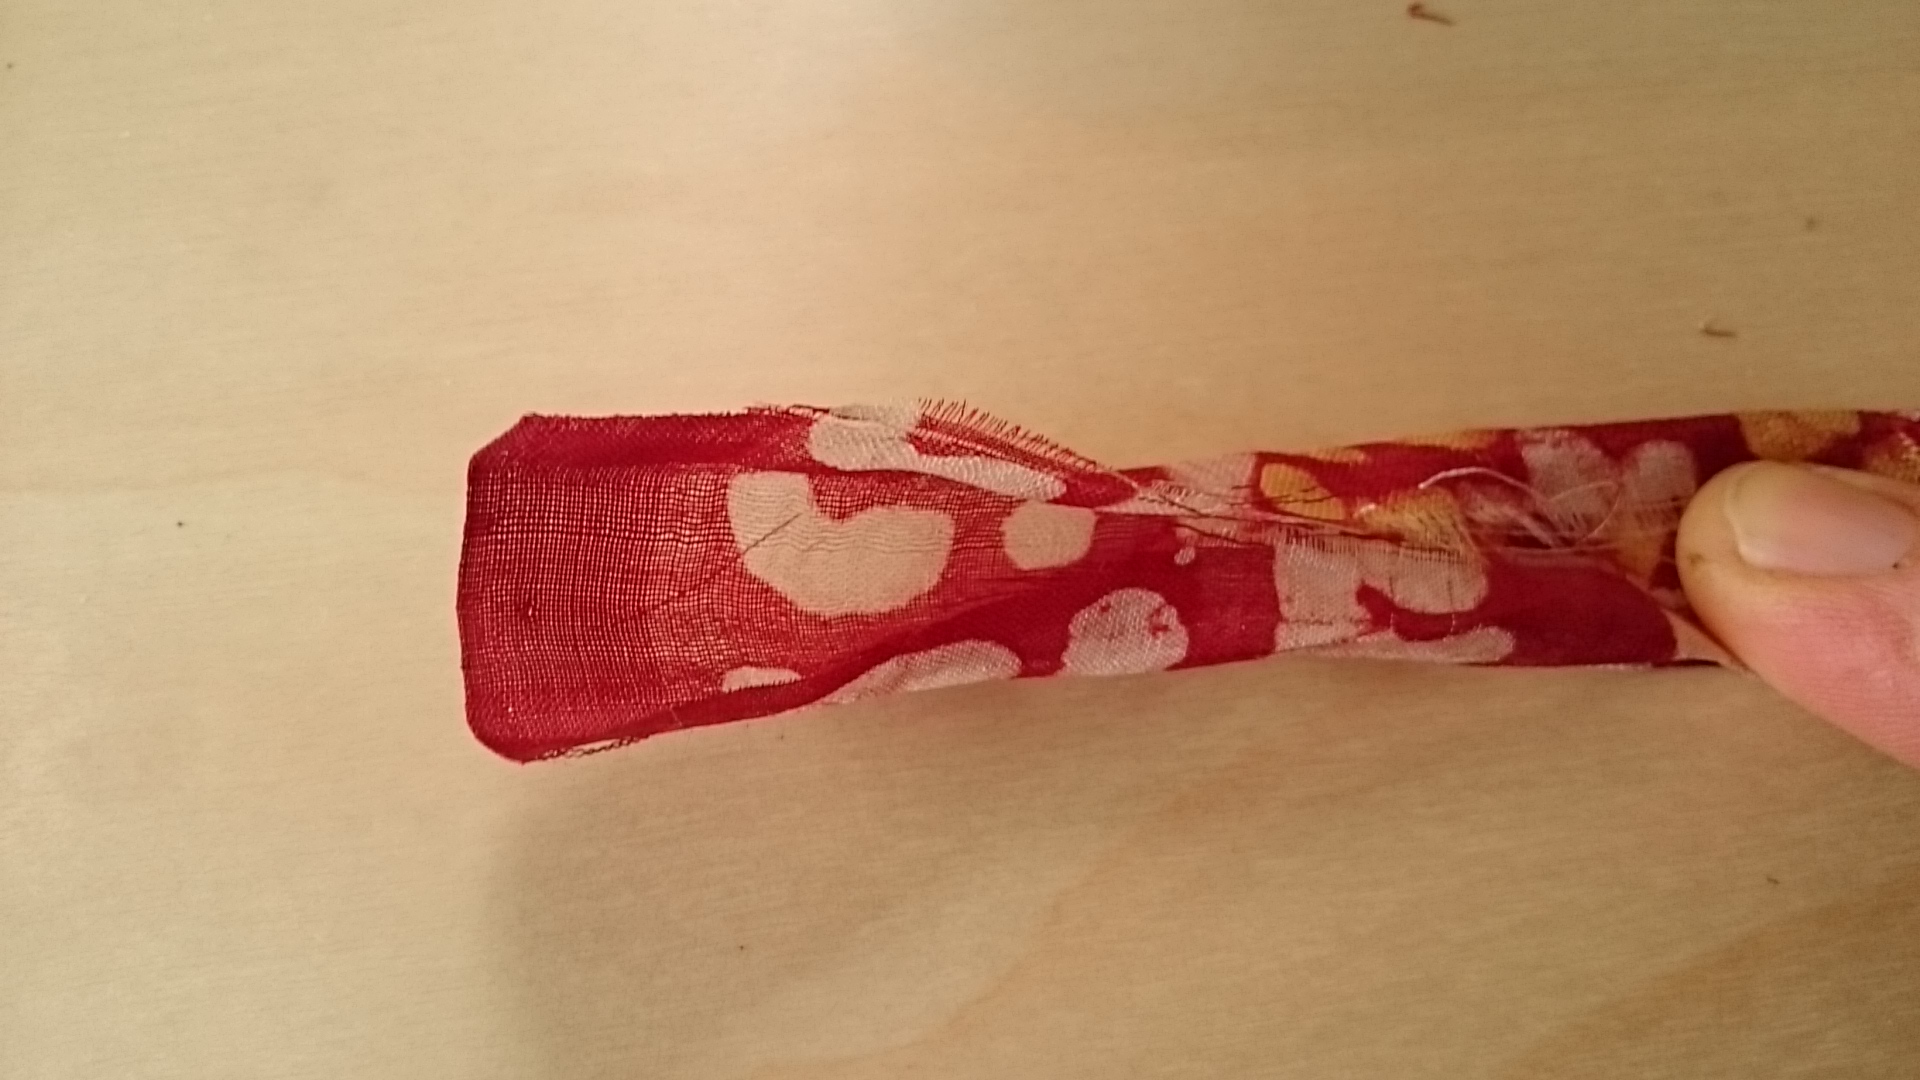
I make scissors cuts in one of the edges, about 3-4cm apart (1.5 inches) apart and then tear the fabric into strips. You need to be careful to keep all the torn fabric in the same direction when you put it down, so I hold onto one end until all of the fabric has been torn.


Then it’s a case of cleaning up what you can without loosing too much fabric. I find the silk strands come away easily, so care is needed. On the right below is the uncleaned silk fabric strands. One the left the cleaned ones. The sewing machine is on the left hence working in that direct is easier. Sadly I have yet to find a way of keeping the loose silk strands so I can use those as well which is a shame because you’ll end up with rather a lot of them!


In true Blue Peter style, here’s some I made earlier. It’s still held on to the sewing machine by the needle and thread, so I could make it longer.

Now I take the new strand and fold the edges in to the middle so that no fraying will occur at the join. I then fold that in half.


It’s hard to show in photos because all it wants to do is unravel. Next I place the quartered strand into the final piece of the strand on the sewing machine.

I then fold the old piece over the new one so that both edges of the old piece get folded inwards encasing the new piece.  I have also found it exceptionally handy if you ensure that the new strand is inside the old one because it passes over the sewing machine fabric grippers much more easily and doesn’t pucker.

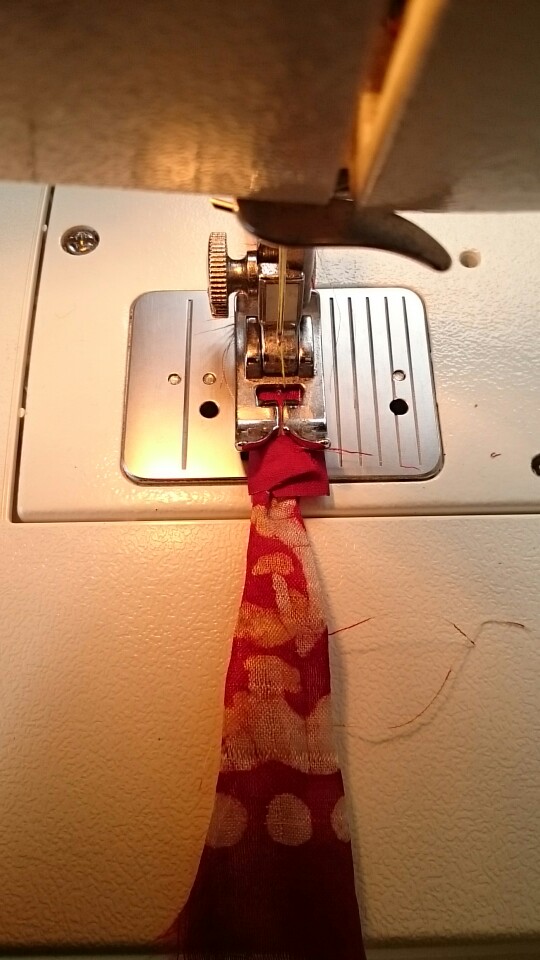
I also put a twist in just as the sewing machine meets the middle of the yarn.

Then it is a case of a wide-ish zigzag stitch twisting randomly as you sew until you reach a free inches from the end of that strand. It doesn’t matter if you miss from time to time, nor which way you twist. I often twist and untwist in the same strand. I’ve found zigzag stitch slightly better than a direct straight stitch because it had a touch more give in it, more stretch.

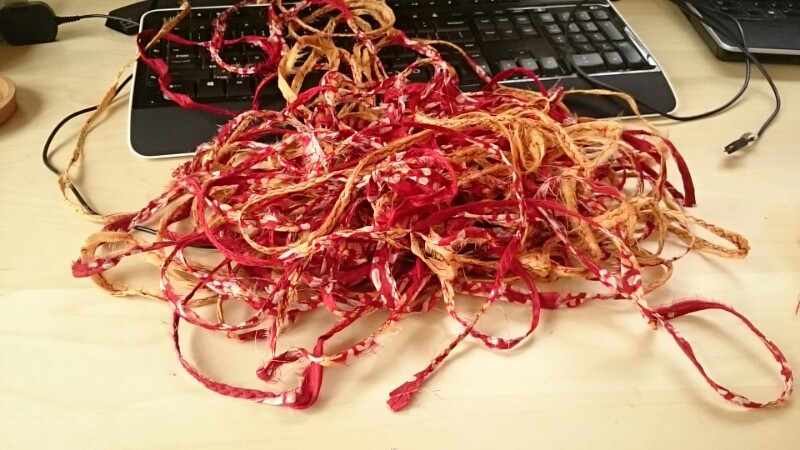
The end result is a pile of sari silk yarn behind the sewing machine. If you are lucky there won’t be too many loose silk strands caught up on the sewing machine and if you are really lucky, your yarn will match your silk and not been too visible!
The final result for me, from that pile was 50metres or 175 feet of sari silk yarn!

Holidays (Part 1)

The last 2 weeks have been Stuart’s holiday.  Or at least they were meant to be.

They started off OK.  We had plans of going away, overnight in the tent, overnight to Sydney having gone by train.  an overnighter with Julia and her family, plus day trips to various museums and towns.  They were planned out, actually given dates and worked out with rest days in between.

But like all plans, they changed when life took hold.  So I will start at the beginning.  With the start of Stuart’s holidays.  The Saturday and Sunday seemed to vanish under a list of jobs to be done.  Lost like most weekends to the mundane side of life.  Lost in a myriad of things that needed to be done.  It has taken a while but I have finally remembered at least what Stuart got up to.  It took 2 afternoons because our nesting area for the chooks is the same area as our roosting area, but the entire roosting solution has been revisited.  One of our rescue ISA Brown hens has been causing issues.  She liked to roost really high up, which meant that others have joined her or gone even higher.  She also likes to roost by herself and I do mean totally by herself.  Roosting up in the hayloft wasn’t too much of an issue, getting up was no problem and all that went up usually found a way down eventually and didn’t go back up there if it was an issue and it wasn’t an issue until I checked the feet of some of the chooks in a random health check.  They all had something called Bumblefoot.  It is where they are landing too heavily on the pads of their feet and causing repeated damage.  It’s a staph infection.  It can cause lameness at its best, death at its worst.  It can also be caused by sharp objections damaging their feet, but as I checked more and more of the flock, too many of them had it and the heavier the bird the worse the problem.

So we fenced off the hayloft and havoc was created for many nights.  The squabbles and cries of those being picked on could be heard in the house.  It turned out that it was Ellie.  Our sweet little Ellie who was so timid and shy when she first arrived.  Well she was picking on the new comers something chronic.  She was also picking on the chicks who were now on their own in life.  She wanted an entire roost to herself.  And I don’t mean just one tier of one side.  I mean that entire side.  The problem was that there wasn’t enough room on the other side for the remaining chooks to roost.  It was a physical space issue and so the lowest in the pecking order had to face Ellie every night.  So after much discussion, we decided to rip everything out.  The uprights that appeared to be supporting the hayloft were not the same wood as the hayloft.  After discussions with our friendly builder, we established they were additions simply put there to put a partition in at a later date, a partition for guinea pigs and rabbits of all things!  So out it came. And a new solution was put in across the back.  We kept the deep mulch beds, just moved them, but the roosts had a major change and this was the end result!

We’ve kept the old floor (for now).
The solution now. Across the back instead of down the left hand side
The roosting perches, so easier to get down options for the older birds who struggled without and the nesting boxes. Anything and everything. Some prefer to lay in the original nesting boxes Stuart made, but most prefer either the pet carrier, a gardening pot or the black plastic boxes.
The hayloft is now fenced off. The cable ties are acting as a reference for the chooks to see that it is not an option because as it goes dark, the fencing is not very obvious.

Monday also seems to have vanished without trace, getting done those things that needed to be done, in the garden, in the house, the shopping, in the… you know the idea.

So when Tuesday came, it was with much relief that plans worked.  I can’t now remember where we went in the morning or if we actually went anywhere!  But I failed to take any photos in the morning and Stuart can’t remember either, so that really doesn’t help, but the afternoon was a return visit to the National Museum of Australia.  It is in the centre of Canberra but like much of Canberra is really easy to get to and this time we knew what we wanted to do!  We take museums in 90 minute intervals.  After that we need a drink in the café or something to eat, depending on the time.  And I need a break from the wheelchair to help my back out.  Luckily the café also has something I can eat in it, but only a dessert and only 1 option (apple strudel).

Carrying on from where we left off. Land management in Kakadu National Park (Northern Territory).
This medallion was created by Josiah Wedgewood from clay from the Sydney Cove landings and is dated 1789.

Also to the lower right (in the shadow) is an explanation of the origin of the name Etruria!  Apparently he named his estate after ancient Etruria which was a civilisation that flourished in central Italy from the 9th to the 1st centuries BC.  Apparently he also based many of his designs for his ceramics on excavated Etruscan porcelain.

It commemorates the first British landings in New South Wales.


We still see these water pumps around the landscape. There are several locally drawing ground water up for cattle and people alike.
Stuart sitting down watching something on one of the video screens that are dotted around the place
A mechanical harvester for wheat (1900)
General layout of the museum
More of the general layout
General Information boards around the place